An official website of the Commonwealth of Massachusetts Here's how you knowHere's how you know

Utilizing Additional Rows in the User Entered Additional Verification Element
There are times where staff may need to request further clarification or another type of verification that is not listed on the Verification Checklist. In these situations, it is important to utilize the Additional Verification Element in the User Entered Verification section in BEACON.
How to Enter a User-Entered Additional Verification
- Go to the Verification tab View/HideView/Hide
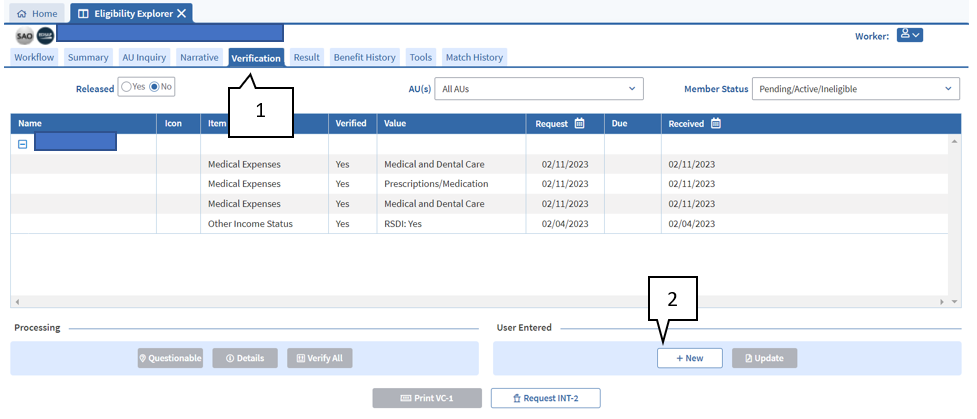
- Click on + New
- The User Entered Verification page will appear View/HideView/Hide
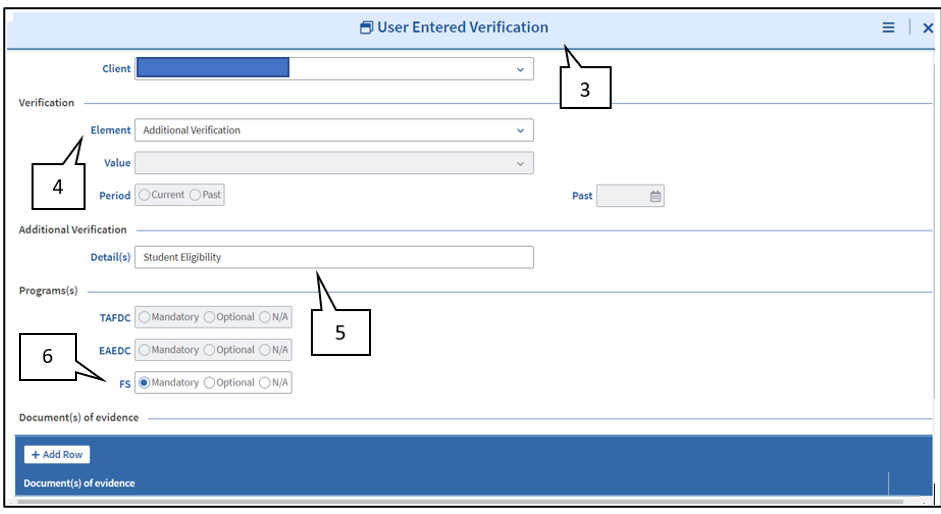

- In the Element section, select Additional Verification
- In the Detail(s) section, enter the title of the verification. This will appear in the Value section of the Verifications tab to help identify the verification requested.
- In the Program(s) section, select Mandatory, Optional or N/A for each DTA program (if applicable), depending on the type of verification you are requesting.
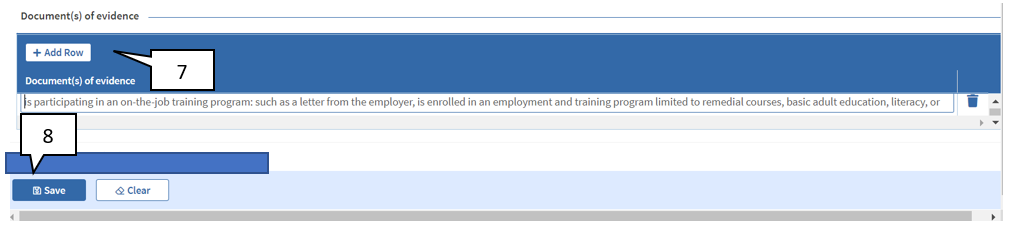
- In the Document(s) of evidence section, select + Add Row. Enter the freeform text you want to display on the VC-1 to the client. You must make sure that everything is spelled correctly, there is appropriate spacing and punctuation, and the content is easy to understand.
-
Important: When entering information in the Document(s) of evidence section, it can only include up to 500 characters including spaces. If you need to enter more information, you must select + Add Row to add another row You must be intentional about how you separate the information in the rows, so that the flow of the information is easy for the client to read and understand. Please note, that each additional row will be represented by bullet points in the VC-1.
-
- Click Save. Once saved, the verification item will be completed and ready to be generated into the VC-1. View/HideView/Hide
Last Update: March 30, 2023
|
|
|
||
| Digital Accessibility Statement | Privacy Policy | Site Policies | Public Records Requests |
|
© 2026 Commonwealth of Massachusetts. Mass.gov is a registered service mark of the Commonwealth of Massachusetts. |
|||